Top News
20.02.2023
End support of our products on Windows 7, 8 and 8.1
28.09.2022
Important information about PayMaker/NetBanking and red and orange payment slips
29.04.2022
PayMaker v6 SIX / Pro
English
Deutsch
Français
Skip to content
Menu
ISR Codeline & Swiss QR Code Reader
PayEye
Plug & Play Box
Accessories
Financial Software & Updates
Paymaker PRO
Paymaker SIX
Paymaker MAC
Customer Service & Drivers
Menu
ISR Codeline & Swiss QR Code Reader
PayEye
Plug & Play Box
Accessories
Financial Software & Updates
Paymaker PRO
Paymaker SIX
Paymaker MAC
Customer Service & Drivers
Welcome to Crealogix Customer Service
Here you will find all instructions and support for our products.
For the latest news, please visit our
News page
.
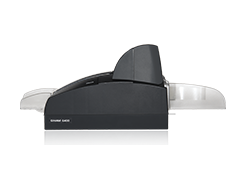
Swiss QR Code Reader & Document Reader
PayEye
QR GiroMat G400 / G130
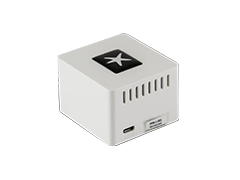
Plug & Play Box
Previous products
PayPen
PayPen II
ScanMouse
Financial Software
PayMaker SIX / PRO
PayMaker SIX / PRO
PayMaker macOS
Previous software
ClubMaker / BusinessMaker
Close
ISR Codeline & Swiss QR Code Reader
PayEye
GiroMat
Accessories
Financial Software & Updates
Paymaker PRO
Paymaker SIX
Paymaker MAC
Customer Service & Drivers